SEO Meta Tags for Every Post in Blogger

SEO Meta Tags for Blogger Post
SEO Meta Tags are most important and useful for our blog's SEO. Meta tags are added to tell search engines what that page is all about. Most important meta tags are the Title and Description of a page. Only these two tags are included in search engines results with site link obviously. As blogs and sites have more than one pages i.e., a blogger blog normally have following pages. Blog home page , post pages, static pages, Labels and archives.

So we cannot use same meta tags for all our pages. Because every page have different content with unique Title and Description. So it is our duty to add different meta tags that perfectly defines our pages to the Search Engines if we want to rank high in the search results.

If we use same meta tags to all of our blog posts, our blog search engine rankings and traffic will be decreased. But, if we add different unique meta tags to different Blog posts, it will make the search engines to know more about our individual blog posts and make them crawl and index our pages better and it also improves our Search engine rankings for sure :)

Well this is the importance of unique meta tags for unique pages. Now lets learn about adding them in your site.

Add Meta Tags for Every Post in Blogger

There are many ways to do this. I'll write each step but the first one is my favourite and I recommend you to apply this method.

Step 1.  Change your blogger settings

Login to Blogger Dashboard >> Select Blog >> Select Settings tab >> Search Preferences

Now Enable search description to Yes.

Write your blog description in the box, it should be limited to 150 characters. Click on Save Changes Button.

Now whenever you create a new post, there will be option for Search Description on the right side. You can write a brief description of every post you are writing. 
(This option will be visible after changing search description setting to “Yes” as described above).

Now we just have to add following code in HTML to add these in our blog.

Go to Blogger Dashboard >> Click Template tab >> Click Edit HTML

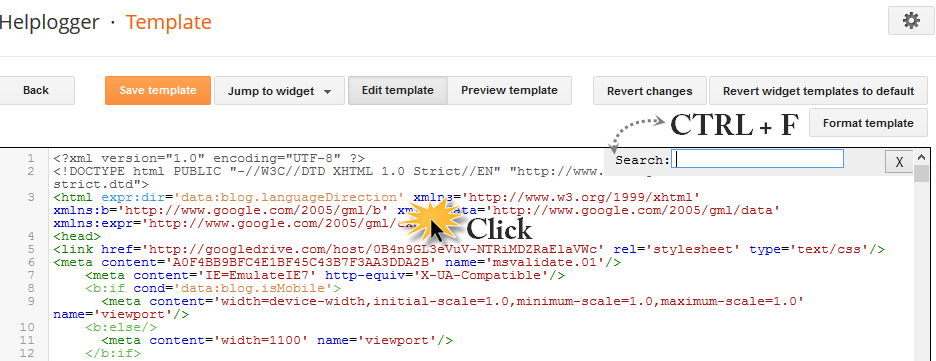
Find the following code [Tip: Ctrl+F]
<head>
After/under this line paste the following code.
           <!-- Meta Tags ~  blogtipsuk.com  -->
 <b:if cond='data:blog.metaDescription != &quot;&quot;'>
<meta expr:content='data:blog.metaDescription' name='description'/>
</b:if>
 <title><data:blog.pageName/> - <data:blog.pageTitle/></title>
               <!-- /Meta Tags ~   blogtipsuk.com  -->
Now Save Template. Your blog posts will now have Title and Description that you wrote while creating your post.

Step 2. Add blogger pages HTML codes

This step is a little tricky. Why? Because you have to add the HTML codes of blogger pages one by one. Just see the code below that can be used to add meta tag for your blog home page URL.

Go to Blogger Dashboard >> Click Template tab >> Click Edit HTML
Find the following code [Tip: Ctrl+F]
<head>
After/under this line paste the following code.
<b:if cond='data:blog.url == data:blog.homepageUrl'>
 <meta content='Your Blog Description' name='description'/>
<title>Your Blog Title</title> </b:if>
Your blog homepage will now have Title and Description that you wrote in this code in place of RED color. Now Save Template. 
You can add other page codes as well see full codes here HTML codes for all blogger pages

Step 3. Add meta tags with URLs

You can add meta tags with specific URLs as well. Just write your desires URL and give that URL specific Title and Description. 

Go to Blogger Dashboard >> Click Template tab >> Click Edit HTML
Find the following code [Tip: Ctrl+F]
<head>
After/under this line paste the following code.
<b:if cond='data:blog.url == &quot;Write URL of page&quot;'>
 <meta content='Your page Description' name='description'/>
<title>Your page Title</title> </b:if>
Your blog page will now have Title and Description that you wrote in this code in place of RED color. Now Save Template.

Remember some points


1. Apply only one method. Because writing multiple tags will be of no use. 
2. Google and all other Search Engine Bots only take those meta tags in their system which come on top the site i.e., if you have multiple title tags then only one title will be taken by bots which in on the most top.
3. You can see your HTML code by pressing [CTRL + U] , just open your blog link and press CTRL + U this will open your blogs page source. and your html site will open.

Need any assistance, don't hesitate to comment down. Have a good day!
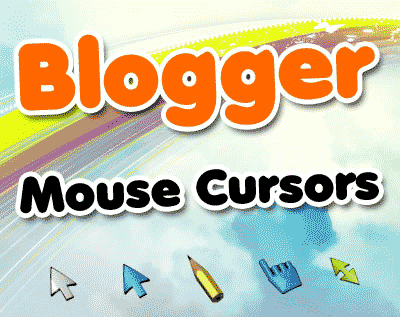
Use stylish Mouse Pointers in Blogger/Blogspot

use Mouse Cursor in Blogger
Hello Friends, in today's tutorial I am going to tell you how to install a beautiful mouse cursor in your blogger blog with a very simple HTML code. Make your blog look beautiful with stylish mouse cursor and back to top button.

Mouse Cursor:

In computing, a pointer or mouse cursor (as part of a personal computer WIMP style of interaction) is a graphical image on the computer monitor or other display device. The pointer echoes movements of the pointing device, commonly a mouse or touchpad, and signals the point where actions of the user take place. It can be used to select and move other graphical user interface elements, and is distinct from the cursor, which responds to keyboard input. The cursor may also be repositioned using the pointer.
You would also like to add:  Emotion Smileys for Blogger Comments

Mostly people, especially new blogger want to make their blog more beautiful and shiny. There are many tricks have been shared on the internet about this issue. But the one I'm going to share, is the easiest method to add a mouse cursor in your blog. Let's now come straight to the solution.

How To Change Mouse Cursor In Blogger

Follow the steps below to do this

  • Log-in to your blog
  • Template >> HTML >> Proceed
  • Search For this code ]]></b:skin> (tip: Use CTRL+F)
  • Now Just above/before ]]></b:skin> insert following code

body{
cursor: url(IMAGE LINK), auto;
}
Now Save your template and view your blog.
Replace IMAGE LINK with the image link of your mouse pointer image.

Tell me in comments if this worked for you. In case of any error comment down I will try to solve your problem. Have a good day ahead!

Add Emoticons Smileys in Blogger Comments

Add Smileys in Blogger Comments
Emoticons/Smileys are a great way of making discussions more interesting and fun, so it's a pity that Blogger don't support them. In this tutorial, I will show you some simple steps on how to add some very cool emoticons called Kolobok to your Blogger/Blogspot comments, so that you and your blog visitors will be able to have an enjoyable time together.

UPDATE: Now available for threaded commenting system too!

How To Add Kolobok Smileys Emotions to Blogger Comments
Step 1.  Log in to your Blogger account and go to Template - Edit HTML

Step 2.  Click anywhere inside the code area and press the CTRL + F keys to open the search box

open the search box in blogger HTML

Step 3.  Search (CTRL + F) for this tag:
</body>

Step 4.  Copy and paste just above it, this code:

a) For previous commenting system with comments that have no reply function:
<!--kolobok-smileys-->
<script src='http://helplogger.googlecode.com/svn/trunk/[helplogger.blogspot.com]smileys.js' type='text/javascript'/>
<!--kolobok-smileys-->
b) For threaded commenting system with comments that have the reply function:
<script src='https://helplogger.googlecode.com/svn/trunk/kolobok threaded.js' type='text/javascript'/>
Note: ignore steps 5-8 if you are using threaded comments!

Step 5.  Now find this code snippet:
<b:loop values='data:post.comments' var='comment'>
Step 6.  Paste the following code just above it:
<div id='smileys'>
Step 7.  Find the following code (look carefully, it should be somewhere below the code from step 5)
</b:loop>
Step 8.  Paste the following tag just after it:
</div>
Step 9.  Now find this code:
a) For previous commenting system:
<data:blogTeamBlogMessage/>
Note: if you'll find it like 4 times, stop to the 2nd one!

b) For threaded commenting system:
<div class='post-footer-line post-footer-line-3'>

Step 10.  And add this code just after it:
<b:if cond='data:blog.pageType == &quot;item&quot;'><script type='text/javascript'>
//<![CDATA[
function moreSmilies() {
    document.getElementById('smiley-more').style.display = 'inline';
    document.getElementById('smiley-toggle').innerHTML = '<a href="javascript:lessSmilies()"><div style="font-size:small; font-weight:bold;color:#000000;">Hide Emoticons</div></a>';
}
function lessSmilies() {
    document.getElementById('smiley-more').style.display = 'none';
    document.getElementById('smiley-toggle').innerHTML = '<a href="javascript:moreSmilies()"><div style="font-size:small; font-weight:bold;">Show Emoticons</div></a>';
}
//]]>
</script>
<div class='emoticons'>
<a href="http://www.blogtipsuk.com/2014/08/add-emoticons-smileys-in-blogger-comments.html" ><img alt="Emoticons Smileys for Blogger Comments" title="Add these Smileys in your site" border="0" src="https://blogger.googleusercontent.com/img/b/R29vZ2xl/AVvXsEhBCqgO1PxvDi95xl_4l8q0Qck4fwgRpEzYazRvHHtWJkhnacBOT2uUgyj49I8DnkTDfyTzT7hyphenhyphenUnjfaNrimRJeGwp_MoJPzJUstBooOyArcYb074tjcOPrM8AkUW8EFRcElVW0O6ZCmVjq/s1600/Add+in+your+Site.jpg" height="20" width="100" /></a>
<span id='smiley-more' style='display: none;'>
<img src='https://blogger.googleusercontent.com/img/b/R29vZ2xl/AVvXsEh4oHa9vrlviX1OC4WfyH6PCjef3M3yNx04vup64_yBYwoL5CYMZWcz6BlMuti_Lyz6PQViaYrSNFJIRmtlQTvDMpoluJ-HQS2UJPyWv4n6yJnRqUfSmUmHeNUbthFnTlUtTFTfD7qzrao/s1600/smile3.gif'/>:)
<img src='https://blogger.googleusercontent.com/img/b/R29vZ2xl/AVvXsEhPQfYO0bxfWg-r1nt2yETWy5Z5P-ShgWMGey9G9v3MzNRznzbWbItcH83Ma9jzinFVhi3WvajVXKFvfS0QJjsARBnKfzKLvyAqXeCqMtc2k3GCKLOwtVvm4MUNmQTyPJIbAZA9pSCkmtE/s1600/sad.gif'/>:(
<img src='https://blogger.googleusercontent.com/img/b/R29vZ2xl/AVvXsEgpsmGjHQTWtQPfyZBqZ6e1_jrhM9DR_4xwSWCFltPAQuzl14xp8Goc8uIAlKQjQNOUJbETE_cuhuMksWXcFwMSyjPCeZ63IOdCOBAN1o56tecyvev_Ml0bjveSDr0XsNOt_G67EjhDJ6Y/s1600/taunt.gif'/>:))
<img src='https://blogger.googleusercontent.com/img/b/R29vZ2xl/AVvXsEgusUgN-Fe6TEFzfb_w2LE8zhwy6wNs7qNXyA0IiMTYyBNF-n7XmHIzAtwGpWk-Kgn_Sw8xAsIty5i07Qg62tc5TIKUsL143W1EiyK2p0UgAoqAFu44eXkGyiI3jKEnG2PkxcVTy88osLs/s1600/cry2.gif'/>:((
<img src='https://blogger.googleusercontent.com/img/b/R29vZ2xl/AVvXsEhmzWdJp8KdIeMOfCrdstn8qYAy-uCYAa2jmjlp0LEsLrNC0GI_AJm4heWNJWyPv9JWWPo-rlvCqpsq87FbAckPg0qkPFvg2X1iKB09zbsTa12D0lc2miJ03Z1R501pSSjBaeCY7L8ppEU/s1600/rofl.gif'/>=))
<img src='https://blogger.googleusercontent.com/img/b/R29vZ2xl/AVvXsEj3fD0WtorbifmlMgDPfA5cYLXq_ab99QwTx3bGpXBUyeUpI6kpaV1urCgoaThB8XiuHgPN_8WOn7VMsqi9CIpzNVzzvUMkqPGf0N7VqCFI3cFcgWqz7kEtIogBgmCkDSkWY3bTidjvV44/s1600/suicide.gif'/>=D&gt;
<img src='https://blogger.googleusercontent.com/img/b/R29vZ2xl/AVvXsEg8RfJLRu3xOS1nXjPyJGjLyzdvakKMwmP3Xjrm1ba6j9PpuylzAZ-082eeLfBj7rAk-J1wtkFl33MirU7QlqPCihj_v2AnOQMA6XZ30d1d9-RrgHSE6mAWo4id-8m4naguJTnQJnscnp0/s1600/biggrin.gif'/>:D
<img src='https://blogger.googleusercontent.com/img/b/R29vZ2xl/AVvXsEjKNVD-AWAJsMeay9cnjZdapawGepz6kTNtJc_PqMtvAam7vr-qFEshSKYXHBf1JpTNMDy-cbSHa4Fl9eMMPnOf0o0OoIUy9xfIrMVaTK4bO2nM3f2w2yuvHunUD4ub76GYDW8H2TqGgpk/s1600/tongue.gif'/>:P
<img src='https://blogger.googleusercontent.com/img/b/R29vZ2xl/AVvXsEjsHB__0dUUSjpL0RJ8opzjA1yU5PkPUzp9aRwytZ_tiQzJ9uNYQUI695WmGjB51URx-P5VvdyjrQzetPGsnUNsIa5RQqtTZ7oaScU5RF0Z6a6s3cFko5y3Y8d8mRyawHAJDnkACLTesz0/s1600/shock.gif'/>:-O
<img src='https://blogger.googleusercontent.com/img/b/R29vZ2xl/AVvXsEjZuGl7uiw1afwDdGT0bQXnitzeZReqmrolbV6mB_WzI1L52BZSnoB70GiDxnmrMHtUFIF0Coa8NyHrWQHmkwfMD4k1V5B-UqMf5LGZYTXu9-ktwxDScTGbGUiLpCyceNIHiBVu6h-6y68/s1600/think.gif'/>:-?
<img src='https://blogger.googleusercontent.com/img/b/R29vZ2xl/AVvXsEjCHEdPxLP4_VSlXPgrqaxgy2hfP1SfjDCdFC1RFT5g-4cz63mDi2gNgD3cERbhnlpBeqybePns1hByN3jMQ846TDjCM_wg7sbgZlA7lQXXN0olp5UtpCHdFJe4s6M4rQxzLGT9d0DBu2A/s1600/unsure.gif'/>:-SS
<img src='https://blogger.googleusercontent.com/img/b/R29vZ2xl/AVvXsEjeNMZaQE9S9ba_ziA2Xag_N8zMKjqdDUKr3sI-NNCPSS3nSTf5nu25tHWi7iPRVuA57G4uV3xJt_OC2D5jTL_DDz5c9prEk_MmnnX3J6AsWO6BVnuf5PNtkuXksEtgfky16_BpG3YDp04/s1600/flowers1.gif'/>:-f
<img src='https://blogger.googleusercontent.com/img/b/R29vZ2xl/AVvXsEj2NOENpOBPG4fbTlPCehWWWeQFonwFjuPeTHZy4Nmxq5CwIgFIJ-FxWrKa10gGGMs_arAF24soZOCNcl64BtZXZxGYpppG65-IFK_GbbYLnQlFA4hiYzgRWvxHFI8NO0lA2Yg6-JdMj1U/s1600/doh.gif'/>d(
<img src='https://blogger.googleusercontent.com/img/b/R29vZ2xl/AVvXsEgm9Np6skLC2Wb3DAY8VKfcxKGrmrVIDpfaLRicOqd3O3VCC6K5IfyQ3AEkebcF8OymO8gGg6hjSOnksH1vsvqPr7JNv2TT8eAepV5V8qfXcwV9UE7VljG4h4SBYgE9SJT4OqAI-Yy1d_w/s1600/air_kiss.gif'/>:-*
<img src='https://blogger.googleusercontent.com/img/b/R29vZ2xl/AVvXsEgBy5xj3SlxEBujv4YUtgcCcOJ3bfLCR0pUk8Uinzr7ZohPTWeaoXO3g6fFhWn1TO4Gjmc1RpZi_3qQ2iFXpbq6i0ND-b6C1hbjmhDzlZE2MSKJAoxuypDE85xaNwVIMA2k6Bb3HiHegow/s1600/threaten.gif'/>b-(
<img src='https://blogger.googleusercontent.com/img/b/R29vZ2xl/AVvXsEjvj59L1djY8ta8KYGAsTaVz2GcSKS323r1Wn0i1mrzjdhSSfcF1yT7QWV_5o9ldl_MyuYs_0ADxS0EovZdes1wXUJ9zkWEK-GETnS2SOioJz_hce7WUDzTdJlKWdL_fqWnW6IZeSWSHyM/s1600/help.gif'/>h-(
<img src='https://blogger.googleusercontent.com/img/b/R29vZ2xl/AVvXsEirXc11HX-xHvPnr7qAunAe8e3R4EzIiIYIZH0njZDJUwgUTwcsIbeFbUw6ZgTVLglaOyCEqPtRuAhxMqYZHKN05VE_4B6biKawLgs09m-PUe2r9rAC6qTuRDoq5rCuL9T9PCso3Q_XRAY/s1600/good.gif'/>g-)
<img src='https://blogger.googleusercontent.com/img/b/R29vZ2xl/AVvXsEjpzA_LxiUu9S9b4QR9TqL59jyZSeq_9j_ZOIcx01StsrqrQ0iXSF0r-OJwclwVXYnmmqKAn6mjY0eOR0M7XdKrPz7BVMsS_OPBTT9jBP4191rTDR2Ar0IEhChVSqY1c3Qqxb7d4jMKTVA/s1600/beee.gif'/>5-p
<img src='https://blogger.googleusercontent.com/img/b/R29vZ2xl/AVvXsEgDvv7dOrVo0-rseNshlSSWPxM0-IzCG9y3KQy_vUmAQZPZW7Bcrgjk1Y7gnTWBuOFUPwdDAJI069ytXuF3PazNxJxbLf4K_fM6SCezObFzDXQXRzjphRUKJxfGs1kb3GK6TJj_EF03ahY/s1600/yahoo.gif'/>y-)
<img src='https://blogger.googleusercontent.com/img/b/R29vZ2xl/AVvXsEhkHq3U_QYl2SIRRYgv2mSdP2slWiUeyhU0xl_uQN2fPa-YeIZHJyIrK9VV467aB8cCJ0loWJi-xNwhk8H3zCzSwwECt4yAfObFlpIT7r9S1jQv454QMF6MlZ6Np68nEzYDJoQJfg4HTh4/s1600/crazy.gif'/>c-)
<img src='https://blogger.googleusercontent.com/img/b/R29vZ2xl/AVvXsEjkdFn3Z0MbJFG3jGDrOlolD2LhO6vkq9GJ5GIRwxv4hTM4xdSCn73SIl8AkhYCKjN9yOecTZq3Kv_yo5o3dR9z5d0MA_tschJ5VZFU3EqsTaGgruBz65cqZ-af5kFfNhLbWL4vDjeBt1I/s1600/spiteful.gif'/>s-)
<img src='https://blogger.googleusercontent.com/img/b/R29vZ2xl/AVvXsEhXxGbB2S6GoaVK2A2DsS4Rgv4NqGW3n7Vb-2LtEylT6ohWZTp2yO1Eb6Ga_YAch6Ahrw83CM-wBM9bLQfE43rZUqCnGaYpMEjyo1AFIiSbTcKCaDbOec-oxBqwnTyuu8tBQmTa2rjTIyQ/s1600/drinks.gif'/>d-)
<img src='https://blogger.googleusercontent.com/img/b/R29vZ2xl/AVvXsEhmyWBgFQs9JyREs15pQSF2CQ0wy8-bGCYFlYguLDgyVsqYeFK4oxMpiVYqvFw1oSHxC5TAtbLv7JRUB1KajQEk4cl6bYnlaZJiO4BkS7Wjj24s-Qt39fR51MIPZSsFJrAbKIIfjdeOR6E/s1600/cheer.gif'/>w-)
<img src='https://blogger.googleusercontent.com/img/b/R29vZ2xl/AVvXsEjeBT3jYH1zmUpWNvTnDWKc2Dr50b1AG5ucW0wZ6cREwrC_pZ4saYcr1Kx3ZfVVl3sPgniJJPrdMR3OErkVMXm9OSadFOkaWIWzAPirOC5SZVzcn8TjGaJjZANtA92GudJmljP0idK9qmU/s1600/hi+2.gif'/>:-h
<img src='https://blogger.googleusercontent.com/img/b/R29vZ2xl/AVvXsEgwTIGsxECmFrJOHEco_YDQyefTYs6ZBdzSTfYn1j6jAL0sCEcIhot8OtQA6tihSKHJ9I4o2tMrsleOUVYRltHfEqq9QJcudPR8b9k4y4xQpMPhxW_VzNpX4UYjj4kiXimCCgo0QfnWHC4/s1600/give_heart.gif'/>:X
</span>
<span id='smiley-toggle'><a href='javascript:moreSmilies()'><div style='font-size:small;font-weight:bold;'>Show Emoticons <img src='https://blogger.googleusercontent.com/img/b/R29vZ2xl/AVvXsEh4oHa9vrlviX1OC4WfyH6PCjef3M3yNx04vup64_yBYwoL5CYMZWcz6BlMuti_Lyz6PQViaYrSNFJIRmtlQTvDMpoluJ-HQS2UJPyWv4n6yJnRqUfSmUmHeNUbthFnTlUtTFTfD7qzrao/s1600/smile3.gif'/></div></a></span>
</div></b:if>
Note: Ignore steps 11-12 if you are using threaded comments!


Step 11.  Finally, find this code
]]></b:skin>
Step 12.  Add this one below, just above ]]></b:skin>
.emoticons {-moz-background-clip: -moz-initial;-moz-background-origin: -moz-initial;-moz-background-inline-policy: -moz-initial;text-align: left;width:400px;}
.emoticons a, .emoticons a:hover {margin-left: 20px;text-decoration:none;}
Note: if you want to change the size of the emoticon container, edit the red code.

Step 13.  Save the Template and you're done. Enjoy!

Hide or Show a Widget on some Pages Blogger

show and hide blogger widgets
Hi Bloggers, you may have noticed, all the widgets/gadgets you add to your blog, will be displayed on all the pages by default, including the homepage as well. And I'm sure very few know that AdSense could disable your account in case you've put ad units inside the content of your contact or privacy policy pages. Therefore, hiding certain elements inside your blog pages is not only a matter of design, but it is also a requirement.

Today I'll show you the easiest and simple ways to show or hide any widget in your blog to show on pages you like. So let's start.

To hide (or show) widgets in particular posts, static pages, homepage or archive pages, you can use these conditional tags.

How to Hide or Show a Widget on some Pages Blogger


Step 1. Go to Blogger's Dashboard > Layout and name the HTML/Javascript gadgets that you have already added. Doing this, it will be easier for you to identify the widgets that you have in your Blogger's template. Give it a unique title so that it does not match with any of the titles of any other widgets already added.

Step 2. Next thing to do is to go to Template and click on Edit HTML

Step 3. Click anywhere inside the code area and press the CTRL + F keys to open the search box

blogger template, ctrl + f, search box

Step 4. Find the HTML of your widget by typing the widget's name in the search box - hit Enter.

Let's say that the title for one of your widgets is "Recent Posts". After searching for the widget's name, You will find a similar code in my template:
<b:widget id='HTML1' locked='false' title='Recent Posts' type='HTML'>
<b:includable id='main'>
<!-- only display title if it's non-empty -->
<b:if cond='data:title != ""'>
<h2 class='title'><data:title/></h2>
</b:if>
<div class='widget-content'>
<data:content/>
</div>
<b:include name='quickedit'/>
</b:includable>
</b:widget>  
This code represents the widget/gadget that you have added in the Page Elements location (Layout).


Step 5. After you've found your widget's code, add the following conditional tags marked with red just below and above to hide the widget from specific pages or posts in Blogger. For instance, in case you want:

To show the widget only in Homepage:

<b:widget id='HTML1' locked='false' title='Recent Posts' type='HTML'>
<b:includable id='main'>
<b:if cond='data:blog.url == data:blog.homepageUrl'>
<!-- only display title if it's non-empty -->
<b:if cond='data:title != ""'>
<h2 class='title'><data:title/></h2>
</b:if>
<div class='widget-content'>
<data:content/>
</div>

<b:include name='quickedit'/>
</b:if>
</b:includable>
</b:widget>

To show Blogger widget only in post pages 

<b:widget id='HTML1' locked='false' title='Recent Posts' type='HTML'>
<b:includable id='main'>
<b:if cond='data:blog.pageType == "item"'>
<!-- only display title if it's non-empty -->
<b:if cond='data:title != ""'>
<h2 class='title'><data:title/></h2>
</b:if>
<div class='widget-content'>
<data:content/>
</div>

<b:include name='quickedit'/>
</b:if>
</b:includable>
</b:widget>

To hide Blogger widget in post pages

<b:widget id='HTML1' locked='false' title='Recent Posts' type='HTML'>
<b:includable id='main'>
<b:if cond='data:blog.pageType!= "item"'>
<!-- only display title if it's non-empty -->
<b:if cond='data:title != ""'>
<h2 class='title'><data:title/></h2>
</b:if>
<div class='widget-content'>
<data:content/>
</div>

<b:include name='quickedit'/>
</b:if>
</b:includable>
</b:widget>

To show the widget in a specific page

<b:widget id='HTML1' locked='false' title='Recent Posts' type='HTML'>
<b:includable id='main'>
<b:if cond='data:blog.url == "URL of the page"'>
<!-- only display title if it's non-empty -->
<b:if cond='data:title != ""'>
<h2 class='title'><data:title/></h2>
</b:if>
<div class='widget-content'>
<data:content/>
</div>

<b:include name='quickedit'/>
</b:if>
</b:includable>
</b:widget>

Note: Replace URL of the page with the address of the page in which you want the widget to appear

To hide a widget only in a particular page

<b:widget id='HTML1' locked='false' title='Recent Posts' type='HTML'>
<b:includable id='main'>
<b:if cond='data:blog.url != "URL of the page"'>
<!-- only display title if it's non-empty -->
<b:if cond='data:title != ""'>
<h2 class='title'><data:title/></h2>
</b:if>
<div class='widget-content'>
<data:content/>
</div>

<b:include name='quickedit'/>
</b:if>
</b:includable>
</b:widget> 

To show widgets only in static pages

<b:widget id='HTML1' locked='false' title='Recent Posts' type='HTML'>
<b:includable id='main'>
<b:if cond='data:blog.pageType == "static_page"'>
<!-- only display title if it's non-empty -->
<b:if cond='data:title != ""'>
<h2 class='title'><data:title/></h2>
</b:if>
<div class='widget-content'>
<data:content/>
</div>

<b:include name='quickedit'/>
</b:if>
</b:includable>
</b:widget> 
To hide widgets in Static Pages
<b:widget id='HTML1' locked='false' title='Recent Posts' type='HTML'>
<b:includable id='main'>
<b:if cond='data:blog.pageType != "static_page"'>
<!-- only display title if it's non-empty -->
<b:if cond='data:title != ""'>
<h2 class='title'><data:title/></h2>
</b:if>
<div class='widget-content'>
<data:content/>
</div>

<b:include name='quickedit'/>
</b:if>
</b:includable>
</b:widget> 

To show widgets only in Archive Pages

 <b:widget id='HTML1' locked='false' title='Recent Posts' type='HTML'>
<b:includable id='main'>
<b:if cond='data:blog.pageType == "archive"'>
<!-- only display title if it's non-empty -->
<b:if cond='data:title != ""'>
<h2 class='title'><data:title/></h2>
</b:if>
<div class='widget-content'>
<data:content/>
</div>

<b:include name='quickedit'/>
</b:if>
</b:includable>
</b:widget> 
Note:  Pay attention each time you're adding a new address which should end up with .com, otherwise it may not work.

Step 6. After you have added the conditional tags, Save Template and view your blog.

Summary:

1.  See which widget you are willing to hide or show in some pages.
2.  Give that widget a Title in you Blogger Layout.
3.  Search it in your HTML code and use the above tags.

That's it!  Have a Good Day :)

Free On Page SEO for Blogger/Blogspot blogs

Get Free on-page SEO for Blogger
Hello from BlogTipsUK.com to all the new beginner bloggers who are facing problems establishing their blogs. Beginners work a lot in writing content but face problems like doing basic SEO of their blogs to get traffic naturally from Search Engines.

We believe good Content without good traffic is nothing. Basic SEO is the best source for getting organic traffic from search engines. So today I am going to share a simple task from BlogTipsUK.com , by doing which you can earn a simple reward that is free on-page SEO for your blog from our SEO analyst and professional blogger, Umar Khaleeq.

Note: You must Join BlogTipsUK.com socially to earn rewards. Every blog will be picked for SEO by owner's choice.

Follow these simple steps. and read the note at the end of post for the terms of the task.

Step 1.  Join BlogTipsUK.com

You must Join BlogTipsUK.com socially to earn rewards.


Step 2.  Join these sites under our Referral Link

By joining these all sites will help you to start earning money online with your blog and eventually will help us too if you join with my links. See a complete list of sites that work best for bloggers to earn money online. if you need any help regarding any site, comment on the respected post.
(this is optional)

Step 3.  Apply all our Widgets in your blog

Apply all our 100% working Best Blogger widgets in your blog without any changing. These widgets will help your blog in many ways. All widgets are stylish and loads fast. Here is the list:
1.  Social Media Floating Widget
2.  Recent Posts Widget
3.  Related Posts Widget
4.  Sliding Facebook Like Box Widget
5.  Facebook comment box in blogger (this is optional)

Step 4.  BackLinks

Enter any one link in a blog post of your choice. Remember only one link is required in any one of your blog's post. (in a post not in sidebar). These two links are mentioned below:

1.  <a href="http://www.blogtipsuk.com/2014/03/increase-traffic-visitors-to-blog-easily.html" rel="dofollow">Increase blog traffic</a>
2.  <a href="http://www.blogtipsuk.com/2014/03/earn-money-from-blogger-blogs-blogging.html" rel="dofollow">earn money from blogging</a>

After doing all the above procedures, please post your blog's link on our facebook page. I will try to reply you as soon as possible. When a blog is picked for on-page SEO, you just need to select a template and I’ll fully optimized it for better SEO. Which will results in better ranking and increases your blog's traffic from all the search engines. Else you can also see our blog's SEO section for more help and info on traffic and SEO.

Reward Terms

1. You must join our site socially e.g., on facebook, twitter and subscribe us by email.
2. You must complete all the steps given above to qualify for free SEO.
3. Optional points are not required for getting rewards.
4. After doing all the steps, leave your blog link on our FB page, which I will review and reply you.
5. Finally, You'll need to select a template and I’ll fully optimized it for better SEO.

Have a Good Day ahead! Keep Smiling.

Highlight Author Comments in Blogger websites with CSS

Change Author Comments Color Style
Hi friends, you surely have seen on many blogs and websites whenever an Admin of the blog or website make a reply to your comments, its comment's color and style is changed from other comments. These admin styled Comments are the best way to make good relationship with blog visitors or Followers.
So do you have a blog and your blog is getting good traffic then your blog will also be getting many comments, that may be positive or negative related to your blog website content.


 If you want to highlight your comments in your blog website, then here is the trick to do that and make your comments stylish,colorful and recognizable to others.Here I am going to share the trick to highlight Author Comments in Threaded comments and this trick also work in basic commenting system. This is coded using simple CSS and Jquery.

How To change Author Comments style In Blogger

Learn how to change blogger admin comments style and color in blogger template using CSS and Jquery for better interaction with your blog's users in easy steps.

Step 1.  Login to Blogger >> Go to Dashboard >> Template >> Edit Html

Step 2.  Find </body> and copy the following code above it [Tip: Ctrl+F]
<script type="text/javascript">
    $(function() {
      function highlight(){
        $(&#39;.user.blog-author,.ssyby&#39;).closest(&#39;.comment-block&#39;)
          .css(&#39;border&#39;, &#39;1px solid #e1e1e1&#39;)
          .css(&#39;background&#39;,&#39;#f1f1f1 url(&quot;https://blogger.googleusercontent.com/img/b/R29vZ2xl/AVvXsEicWqY359PMJSTrFZrCT9wuW0fLJA_MQ-ghyphenhyphenYt19TrvBqExN0lde3-KC3_JOZjsVNXSNaWE9D2PGb1KSlEoXtkeFT7A0BfHMQwefg0F7AMtTNCz_8pA97UoTVnxUD9qm9_zJ4zIWv0A1Xk/s1600/admin_comment1.png&quot;) no-repeat bottom right&#39;)
          .css(&#39;padding&#39;, &#39;10px&#39;);
          }
          $(document).bind(&#39;ready scroll click&#39;, highlight);
   });</script><a style="display:none" href="http://www.blogtipsuk.com" >Blogger seo tips</a>
Step 3.  Change red color bolded text according to your choice for border of the author comment.

Step 4.  Now save your template and you are done.

Congratulations you are done. If you enjoyed this article please like and share.